These days, it’s relatively easy to create a screencast tutorial video. With just a couple of tools, anyone can record a video of their screen and upload it to YouTube. But if you want to create effective instructional videos people will actually watch and share… well, that takes a little more effort.
If you’ve watched many screencast videos, you’ve probably noticed they’re usually created by an ‘expert’ who’s just rapidly clicking through screens and checkboxes in a dizzying blur, while using confusing tech jargon and trying to impress you with everything that’s in their head. They may be an expert user of the software, but they’re certainly not focused on education — on making sure that you, the viewer, can actually learn.
Since 2008, I’ve created more than 1,500 screencast tutorial videos for my own WordPress tutorial series, and clients like Automattic, GoDaddy, WooCommerce, Namecheap, and dozens of others.
In this guide, I’ll walk you through the tools and techniques I’ve learned so you can create screencast learning videos that will actually help your audience learn. Then, I’ll include some bonus tips for how you can improve your screencasts so people will actually watch and share your videos.
Before we dive in, let me clarify what we’re talking about when we say, “screencasts”.
What is a screencast?
Simply put, a screencast is a digital recording of your computer screen, usually accompanied by audio narration. Screencasts are great for showing viewers the best way to use an online application, or software application, step-by-step.
Screencast videos are an excellent way to introduce your product to new customers, or help existing customers get up to speed with your product. And that translates to fewer calls and emails for your customer support team.
Screencasts can also be used to help a new employee get up to speed more quickly, without requiring another, more veteran employee spend their valuable time teaching a new hire the basics.
If you find that you’re often repeating the same instructional content over and over again, it might be time to create a screencast. Record a screencast video once, and then share it with your employees or customers.
Screencasts are perfect for online learning, because they enable your audience to watch and learn whenever it’s most convenient for their schedule. Plus, they can return at any time for a quick refresher.

What makes an effective screencast?
A well-crafted screencast guides the viewer, step-by-step through the best way to achieve a specific goal, task, or outcome — clearly and concisely.
- No more than five minutes in length.
Chances are, if you can’t cover the material in less than five minutes, you’re trying to cover too much ground. - Clearly articulates the goal or objective.
What is the problem your audience faces? And what is the specific objective or goal of the tutorial? - Both conversational and educational.
Good narration sounds natural and conversational, not like someone reading a book aloud. - Easy to follow, step-by-step instructions.
What are the specific steps required to accomplish the task? Nothing more, nothing less. - Showcases the product. No distractions.
No distracting desktops background, notifications, random cursor movements, ‘uhs’ or ‘ums.’
Alright, now that we’re clear on what screencasts are and how you might use them, let’s dive in!
3 Tools You’ll Need to Create a Screencast
It’s worth noting that you don’t need expensive equipment to create great screencasts. You can start with basic, inexpensive tools, and then upgrade later. That’s why I’ll recommend multiple options for each of the tools below.
Here are the three tools you’ll need in order to create great screencasts:
1. Screen Recording Software
You’ll need software to record your on-screen actions and accompanying narration, then export and share that video with others.
If you use a Mac, you’ll find that you can create decent screen recordings using the free QuickTime Player application. Just launch the app, then choose File > New Screen Recording and click the red button to begin recording your screen actions. You can record either your full screen, or just a portion of your screen.
When you’re finished recording, simply save your video to your computer, or share it via email, YouTube, Vimeo, or any of the other built-in destinations.
While this method is fine for creating very simple screencasts, you’ll soon discover that the editing tools are quite rudimentary, if not downright frustrating. So, when you’re ready to begin creating more professional screencasts, you’ll want to invest in a proper screen recording program like Camtasia or my personal favorite, ScreenFlow.
Camtasia and ScreenFlow cost roughly the same, offer similar features, and function in pretty much the same way. But each application has a slightly different user interface and editing tools. You may find that you simply prefer one over the other. Personally, I prefer the overall experience of ScreenFlow, including the editing interface and the powerful export tools.

My favorite feature in ScreenFlow is the ability to publish directly to YouTube or Vimeo with just a single click. This eliminates the time-consuming process of exporting, then converting the final video into a suitable format, and guessing at a suitable data rate, final size, or frame rate. Best of all, the final video is of noticeably higher quality when exported directly to the video hosting service.
Q: What screen recording software do you use and recommend?
A: Hands-down, ScreenFlow. On a PC? Camtasia is your only choice.
2. A Microphone for Recording Narration
Believe it or not, the first thing people will notice about your video is the quality of the audio.
Don’t use your computer’s built-in microphone to record your narration. The audio will be muffled or unclear, filled with distracting background noises, echo from the room, or worse… the clatter and thud of your fingers on the keyboard.
After the screen recording software itself, the next most important piece of equipment is a high-quality microphone.
Start with a USB Microphone.
If you’re just starting out, I’d recommend you begin with a USB microphone. They’re affordable and provide decent audio quality. One of the biggest advantages of using a USB microphone is that they require no additional hardware. Simply plug the USB cable directly into your computer, and you’re ready to start recording!
Now, I’ve purchased and tested dozens of microphones over the years. I have a background in professional audio engineering, and I really enjoy testing new microphones. In my tests, the Blue Yeti continues to be one of the best entry-level USB microphones on the market. It normally retails for $129, but you can often find it on sale for even less.
Ready to level up? Step up to the Shure MV7.
But if your budget permits, I’d highly recommend the excellent Shure MV7. It just may be the last mic you ever need to buy.

The Shure MV7 is basically a ‘junior’ version of the highly popular Shure SM7B, which you’ve probably seen in dozens of podcasts. And in my tests, it sounds very similar, despite costing $150 less. But unlike the popular SM7B, the MV7 has both a USB connection and an XLR microphone connection. That means you can use it out of the box as a simple USB microphone, or with an audio interface.
But what makes the Shure SM7 so great is the included software. MOTIV™ is a lightweight desktop app that powers the Shure MV7. It has two modes: Auto Level and Manual Mode.
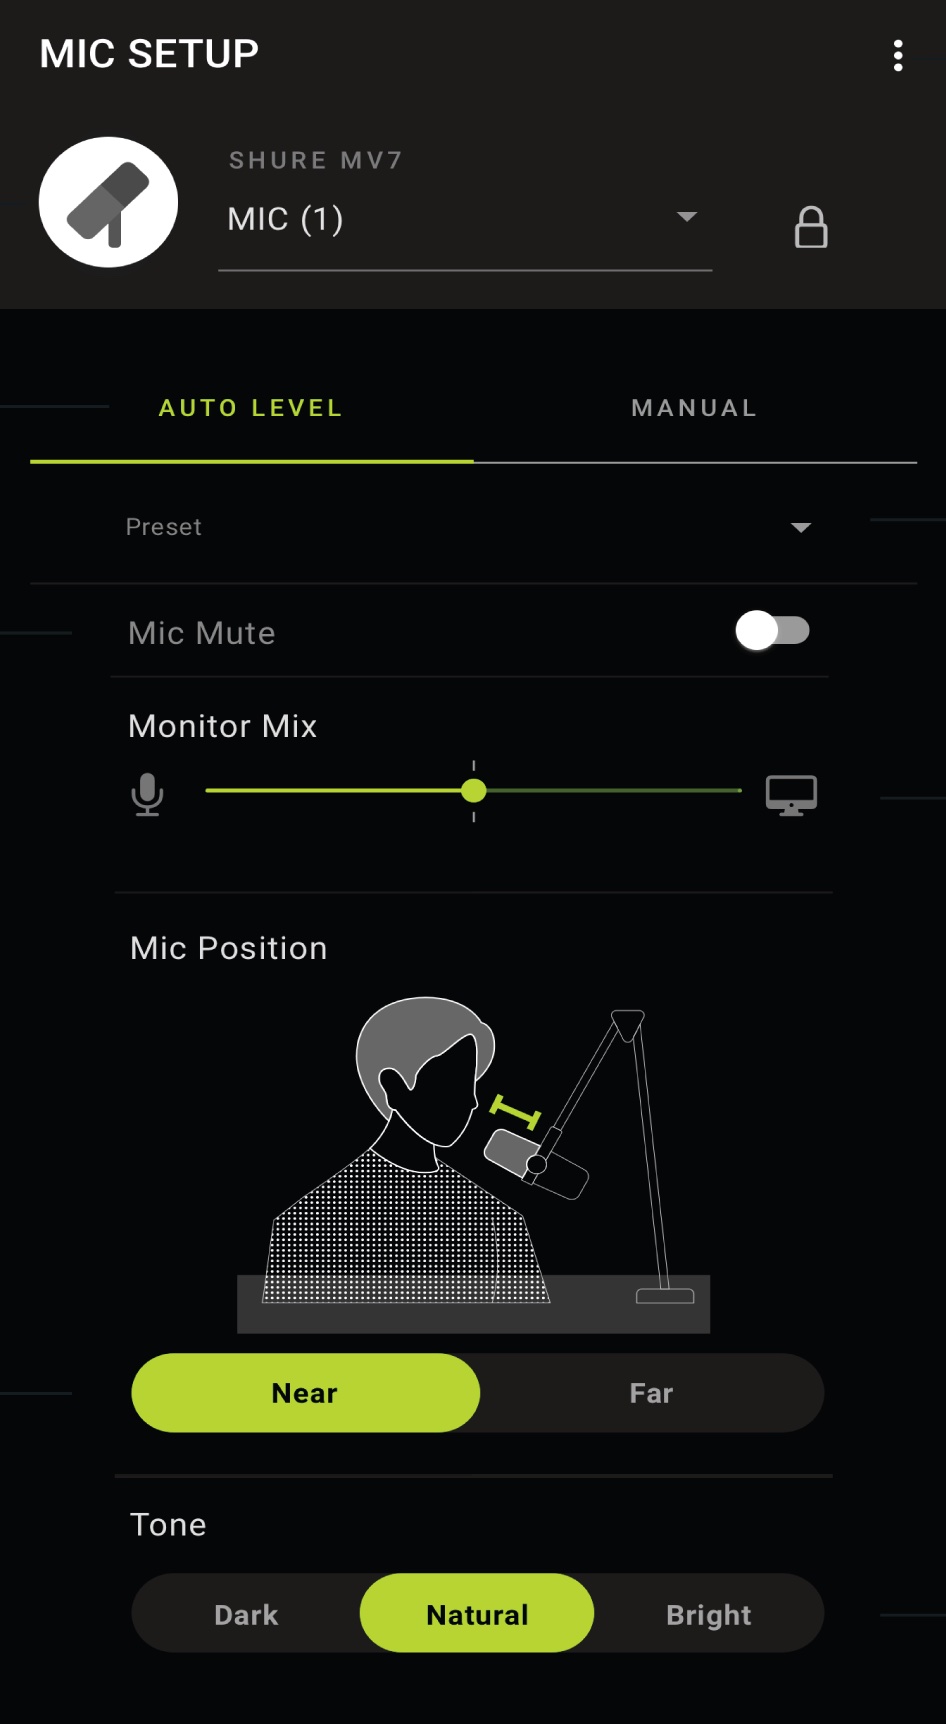

In Auto Level Mode, you just set the mic position (near or far), and the tone you want (dark, natural, or bright). That’s it. The software does the rest. It automatically adjusts the volume, EQ, and more to make your voice sound the best.
In Manual Mode, you can adjust the mic gain, monitor mix, EQ, limiter, compressor, and more. So you’ll have as much control over the quality of your narration as you want.
At $249, the Shure MV7 is a fantastic microphone you can use to record professional-quality voice-overs for your screencast videos, create a podcast, or sound more professional on webinars and video calls. It may be the last mic you ever need to buy!
Q: What microphone do you recommend for screencasts?
Good: If you’re on a limited budget, start with the Blue Yeti.
Better: When you’re ready to step up your game, you’ll want a dynamic mic like the Shure MV7.
3. A Quiet Place to Record
Unless you have access to a professional recording studio, you’ll likely find yourself recording screencasts in your office or perhaps a semi-quiet room in your house. But, as you’ve probably already noticed, your microphone still picks up distracting background noise and echo from the room itself. Nobody wants to hear your phone ringing or your dog barking in the background of your video.
So, how do you soundproof your recording area to eliminate room noise and pesky echo?
Professional voice over artists use expensive, purpose-built vocal booths, which are insulated and completely soundproof. But you don’t have to spend a fortune to create a quiet environment for recording your own voice-overs.
A well-known hack used by many beginning voice over artists is to simply record in a clothes closet. No kidding.
The hanging clothes in a tiny space dampen and absorb the sound of your voice, rather than reflecting it back into the microphone, virtually eliminating echo and creating an intimate, ‘up close’ sound.
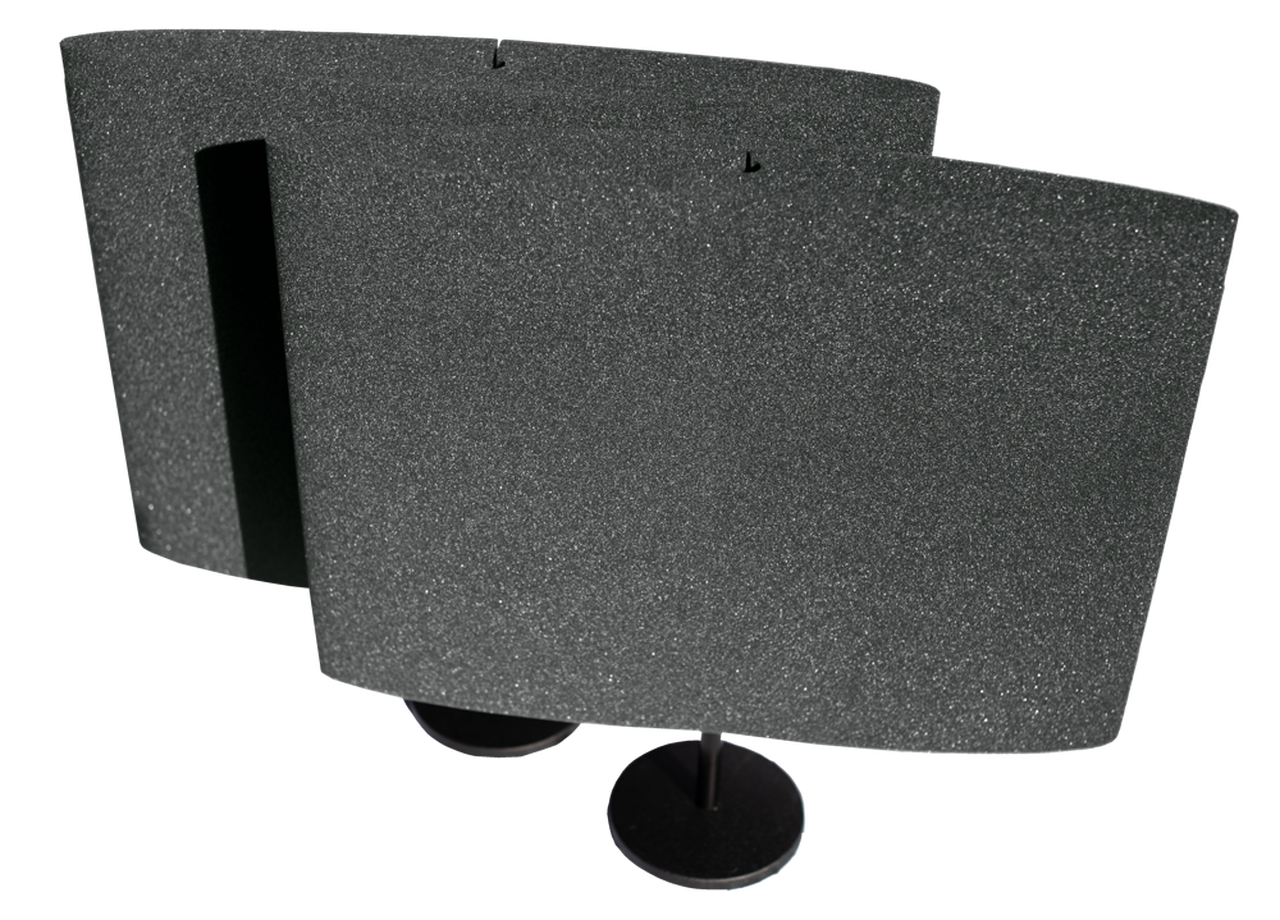
But, if you’re like me, you prefer to record at your desk. If so, buy two of these inexpensive DeskMAX panels by Auralex, and position one on either side of your computer and microphone. These do an amazing job of reducing room echo, and may be the only additional soundproofing you require.
Q: What’s the easiest way to reduce room echo and background noise while recording?
A: Purchase two DeskMAX panels, and position one on either side of your computer and or microphone. To go one step further, purchase two of these Sound Wall Panels and position them directly behind you to create an excellent temporary vocal recording booth.
With these three tools, you’re ready to start recording. So let’s move on to the good stuff… how to actually create a screencast!
How to Create a Screencast Video
Broadly speaking, there are two methods for recording screencasts. The first is to simply hit “Record” in your screencast recording software and then record your screen actions while narrating at the same time. It’s easy and quick. But it often results in awkward pauses, or ‘uhs’ and ‘ums’ — because it’s difficult to concentrate equally on both the on-screen actions and also your narration.
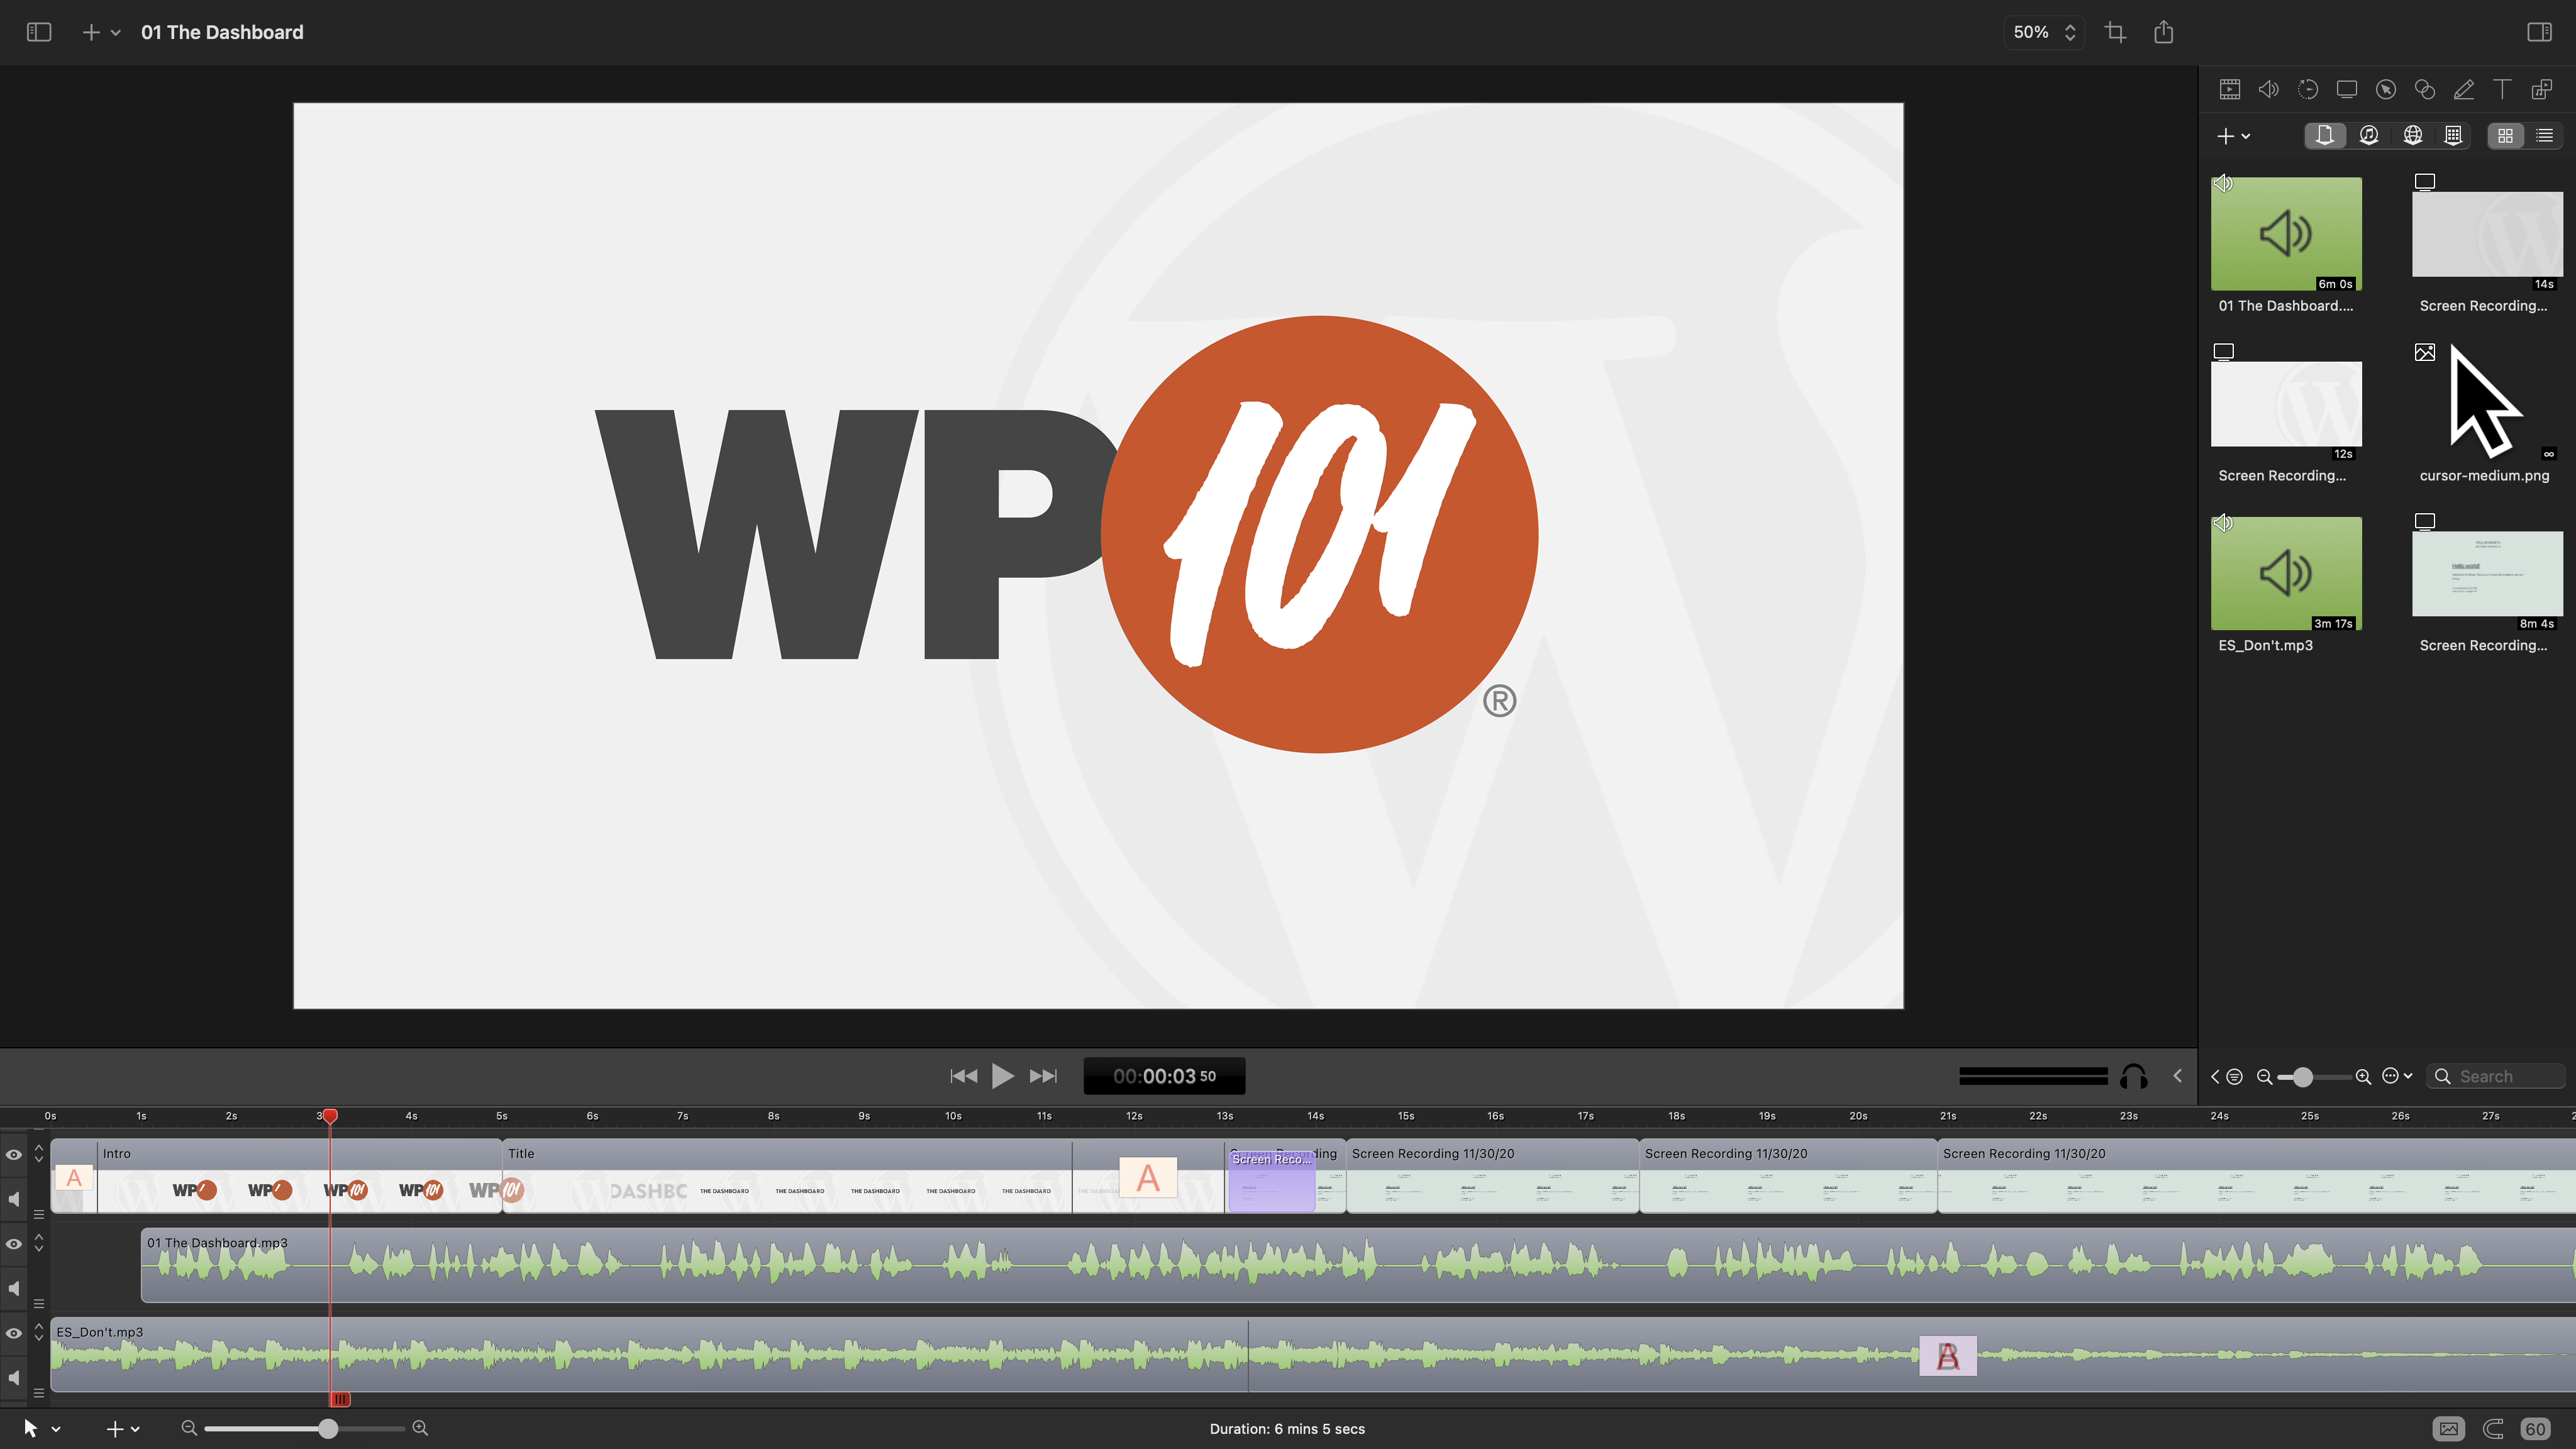
That’s why I prefer a second, more strategic approach. I write a detailed, word-for-word script first, during a ‘dry-run.’ Then, I record the voice over or narration in Logic Pro (you could also use GarageBand), carefully inserting deliberate pauses where needed.
Next, I import that audio file into ScreenFlow, and then record my on-screen actions while simultaneously playing back the narration audio. This ensures that the narration is as clear and succinct as possible, and that the on-screen actions are perfectly synced to the instruction being presented.
Here’s the exact process I follow to create a screencast…
My 10 Steps to Create a Screencast
- First, collect any materials you want to include in the video. These might include a high-resolution logo file, as well as any existing pre-roll, intro/outro graphics, and/or music.
- Set up a fully functional local demo environment. I prefer to work from a local installation to ensure there are no unsightly delays or ‘spinning beach balls’ during recording due to Internet speed or server ‘hiccups.’
- Write a detailed, word-for-word script for the voice over/narration, alongside a description of what’s happening on-screen during each moment of the video. This helps to visualize the video before it’s created.
- Record the narration/voice over. Narration is the most important ingredient in a tutorial video. Strive for a conversational tone, as if you’re talking with your best friend.
- Export the final audio file, then import it into ScreenFlow. MP3 format is fine.
- Record the on-screen actions while simultaneously playing back the audio, if it helps. In ScreenFlow, you can hit, “Record,” then immediately hit the play button in your project to begin playing the narration, while you record your screen actions. This enables you to perfectly time your on-screen actions to align with your narration.
- Optionally, create an intro and outro. (See more details below.) Even a simple intro that includes your logo and a title screen will add polish and make your video look more professional.
- Optionally, add music. You can license royalty-free music for use in your video. Minimally, consider adding a 15-second instrumental clip during the beginning and end of your video. I use and recommend Soundstripe, PremiumBeat, and Epidemic Sound. If you do add background music, be sure to also enable ‘ducking’ to automatically reduce the volume of the music whenever there is spoken word present, so the music doesn’t drown out the narration.
- Edit and export the final video. — Time to put all the pieces together! During this stage, combine the voice over, on-screen actions, intro/outro, and background music, then edit as needed.
- Export the final screencast to your video host and share with the world!
5 Pro Tips for Even Better Screencasts
- Hide that desktop!
You’ve probably seen countless videos where the author recorded their entire desktop, including all the folders on their desktop, menubar, and even windows from other applications in the background. Nobody wants to see all that. Temporarily hide all those files and folders scattered around your desktop, or better yet… - Use Full-Screen mode.
If your application supports Full-Screen mode, enter that mode before recording. This will completely hide all those folders and files cluttering your desktop, as well as your menubar.
I use Vivaldi (or Chrome) for nearly all my screencasts, so I also hide the address bar, tabs, toolbars, status bar, and bookmarks bar — basically everything other than the main browser window, ensuring the entire recording area is available for my content. No distractions. - Change your screen resolution.
Newer laptops and monitors support very high screen resolutions up to 5120×2880 or even higher. The problem is, your audience will likely not view your video at that same, gorgeous, full-screen resolution. Many people will watch your video on a mobile device. And when your video is viewed at smaller sizes, text and other items in your video may become too tiny to be legible.
One easy way to handle this is to simply change your screen resolution to 1280×720 before recording your screen actions. This is still HD video resolution, but will ensure legibility when your video is viewed on smaller screens (like mobile devices).
EVEN MORE PRO TIP: Set your resolution to 2560×1440, and then zoom the web browser to 200% to mimic the scale and resolution of a 1280×720 monitor. This will ensure that everything on screen is still legible, even on a mobile device. Plus, it has the added benefit of allowing you to zoom in ScreenFlow without pixelation or sacrificing image quality. - Increase the size of your cursor.
Even if you record at 1280×720, your cursor can still appear very tiny, which makes it difficult for your viewers to follow your on-screen motions. On a mobile device, your cursor will look like a gnat!
If you use a Mac, go to: System Preferences > Accessibility > Display and increase the Cursor Size to “Large” before recording. This will make it easier for your viewers to follow your on-screen actions as you move your cursor around the screen. - Install the SmoothScroll extension for Chrome.
It’s disorienting when a video suddenly ‘jumps’ up or down the screen. It’s nearly impossible to follow your on-screen actions. As the presenter, you know that you scrolled down the page, but your viewers are left to wonder what just happened.
The SmoothScroll extension for Chrome slows down your scrolling actions, easing your screen up and down smoothly when you scroll with the mouse wheel or the keyboard. I nearly always use the arrow keys, or Page Up/Down keys to scroll precisely and smoothly to the portion of the screen I wish to highlight. This helps your viewers to easily follow your on-screen actions, plus it adds another degree of professional polish to your final video.
BONUS: How to Create an Animated Intro for Your Screencast
You don’t need to invest in expensive software to create a simple animation (or, ‘bumper’) for the intro and outro of your videos.
Both ScreenFlow and Camtasia include handy editing tools you can use to animate an object (like your logo) by fading and zooming it into frame. Sometimes, that’s all you need… and simple is always best.
You can go one step further and create a more interesting animation including transitions and effects in Apple’s Keynote. You might also use PowerPoint, but it doesn’t contain the same cinematic-quality transitions and effects.
Then, export the animation/presentation as a video file, which you can import into your screencast project.
Export Settings
As I mentioned before, one of the most helpful features in ScreenFlow is the ability to publish directly to YouTube or Vimeo with one click. This eliminates the time-consuming process of exporting, then converting the final video into a suitable format, while guessing at a suitable data rate, final size, or frame rate. Best of all, the final video is of noticeably higher quality when exported directly to the video hosting service.
For years, I exported a ‘Lossless’ video file at full-resolution, then used HandBrake to convert that video file into a more web-friendly format and size.
When manually exporting video files for use on the web, here are the settings I use: H.264 .mp4 file format at 1440p (2560×1440) @ 60fps (5,000 kb datarate)
A Final Note About Video Hosting
A while back, I wrote a detailed article outlining “10 Reasons Why You Should Never Host Your Own Videos.”
Without repeating all those reasons again here, let me simply share my recommendation for hosting video…
Once you’ve created your screencast video, the best way to publish and distribute your video is to upload it to a video hosting service like YouTube, Wistia, or my personal favorite, Vimeo.
Then, you can easily share your video on social networks, or embed your video on your own website and invite folks to watch your video there.
If you want people to find your video via search, YouTube is your best bet. But, if you want to protect your screencast video, for example, for use in a membership site or an online learning portal, then you’ll love Vimeo’s built-in protection features. You can hide your video from the public, then specify the domain or website on which you want your video to be viewable. This protects your content for only the people you want to watch.
Whatever you do, don’t host your videos on your own web server. Use Vimeo instead.
Got questions?
Whether this is the first time you’ve attempted to create a screencast, or you’re a seasoned pro, I hope this article has helped you learn how to create better screencasts that your audience will enjoy watching.
If you’ve got questions, or need a little advice about creating more effective screencast tutorial videos, feel free to reach out. Or, if you prefer, schedule a call and let’s chat!